 |
| © R. Mark Sink |
This idea came about after reading an article in reference to wellness associated with standing desks. It immediately dawned on me that this was a great woodcraft idea that you as a reader might appreciate. About an hour later the design was complete and in a matter of a couple of days, anyone with a few woodworking skills could easily build their own standing desk using 3/4 inch plywood. (Read my article on the standing desk reader and see an additional design)
For this particular project, I had several pieces of Honduras mahogany that were left over from other projects. If you have scrap plywood, you too can use up the material and if you have a couple of larger pieces for the shelf and top section, you could practically build one inexpensively.
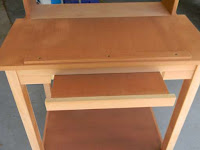
With this design, the top section is hinged to the front edge allowing the top to tilt up by sliding in two locks on each side that hold the top in that position. The uses for this type of table are endless. Here are just a few.
- Computer table: Monitor, keyboard, mouse; hard drive, printer below
- Standing drafting table
- Workbench in garage or storage room
- Kitchen storage and work table
- Office desk or activity table
1. Table saw (recommended)
 |
| © R. Mark Sink "Color imperfect" |
2. Electric miter box (recommended)
3. Electric Circular saw (minimum requirement)
4. 18 gauge pneumatic brad nailer and brads 1" to 2" (recommended)
5. Drill and various screws (minimum requirement)
6. Wood glue and applicator (highly recommended)
7. Jigsaw (recommended)
8. Planer
9. Jorgensen Bar Clamps
This short list reveals that having access to a table saw is the #1 best way to accomplish the many cuts necessary in building your standing desk. In the design kit, a complete list of sizes that are needed are listed. This way, you can take the list to someone else to have the cuts made if necessary.
 |
| © R. Mark Sink |
It is possible that the design could be assembled with screws but seems to numerous for many of the smaller parts, such as trimming the edges. The tilting top has pieces underneath that are notched to accommodate three different heights and these were cut with an electric jigsaw.
"I occasionally recommend tools and when doing so there are many tools I would absolutely NOT recommend as they are defects made by major brands. I try not to link to these bad experiences. I also do not want to give any particular manufacturer a bad name, but would also like to express that we are getting tired of the downgrades sold at depots and perpetrated online. My most successful purchases have been from Porter Cable© and Delta©."
 |
| © R. Mark Sink |
Between the two sliding tilt locks is a pullout that can be made up to about 18 inches long. This could also be converted into a drawer with a little skill, that saying, the inside front may be altered to accommodate your preferences in reference to the sliding structure that has been laid out in drawings and instructions.
The legs are cut at approximately 2 inches wide and two pieces are joined together that are 3/4 inches thick and providing the rabbits for the lower shelf which is part of the overall structure. The grain sections of the material were then faced with cherry material that was left over material re-cut on the table saw and planed to size.
This is where carpentry is at its best when the woodworker has the capability to remake any material on command. Very often, a piece of 3/4 inch material can be turned up on its edge and ripped from each end (at no point does the full piece being cut pass through the blade) leaving two pieces about 5/16 inch thick which then can be planed slightly on each surface and edge and giving the woodworker a smooth trim piece that serves well for edge facing.
The only hardware necessary for the standing desk design kit is two hinges approximately 2 inches long and a half width of 15/16 inch or the appropriate overlay to match the top sizing.
 |
| © R. Mark Sink |
Complete instructions including drawings and a step by step plan is included with your contribution of $5.95 and you can get access right now to the standing desk design kit and get started. You'll be directed back to a page where you can immediately access the online interactive instructions.
You will also want to possibly finish your standing desk by staining, and an appropriate clear finish, or possibly priming and painting the piece to your suiting. Some may want to just build the standing desk out of pine material with screws or a cheaper grade product and to use the standing desk as a work table in their shop. It's best to get started and start feeling better by not spending so much time sitting which becomes unhealthy. Good luck with your project.